Size Chart
Balance Boards


Medicine Balls


Half Balls


Rope Balls
Fascial tissue is the strong and pliable connective tissue covering the muscles and bones and helps suspend the organs. Myofascia surrounding the muscle bundles together to create the tendons of the muscle. It is responsible for tissue gliding and fluid, ion, oxygen and toxin exchange. When this tissue becomes dehydrated and dense, it constricts the muscles.
Think of a plastic bag to store food. When the bag is simply sealed with some air in it, you can still move the food around and shape the bag. If you vacuum sealed the bag and deprive it of any oxygen and air space, the food inside becomes dense and hard to move. Tight fascia is like vacuum sealing your muscles.
Fascia is connected throughout the body in a dense network and spans over multi-joint structures. Tight and restricted neck fascia can cause pain down to the hand. This domino effect causing referred pain to other areas of the body can cause confusion in properly assessing and treating injury.
The fascia wants to be the superhighway of your body with all lanes open and free from traffic jams. One way to keep your body in great working order is to address fascial dysfunctions. There are several types of myofascial release techniques either done by the self or a practitioner.
____________________________________________________________________
Body Scan:
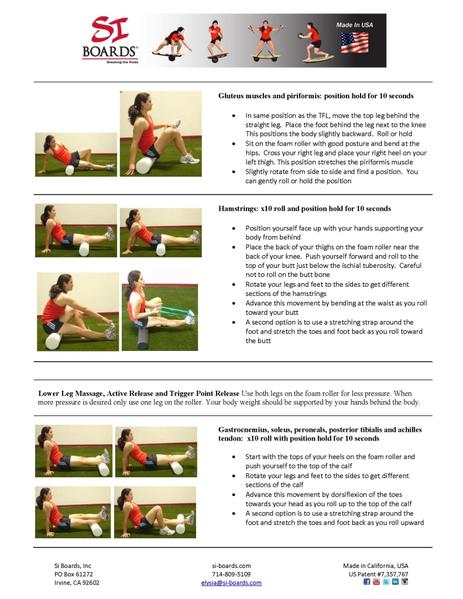
First scan your body as you roll on the foam roller to assess any areas of tightness or pain. Areas that feel tight or extra painful can be trigger points and an area of dense restrictive tissue. Roll 5-10 times over an area for general warm-up and to mobilize the tissue.
Constant Pressure:
The second technique is to apply specific pressure on those trigger points/areas of tightness while staying in a constant position. Apply pressure for 30-90 seconds or until you feel at least 50% relief. This technique can be very painful for beginners. If you are extremely uncomfortable do not push past your limit. The tissue needs time to adapt to the pressure and slowly release over 90 seconds.
Constant Pressure With Muscle Movement:
The third movement is to apply constant pressure from the foam roller and move your body through range of motion. This essentially applies pressure to one area and requires the muscles to stretch and glide over that pressure. This active release technique can also be painful for beginners.
Active Rolling While Stretching:
The fourth movement is to actively roll on the foam roller as you strength and lengthen that body part. This elongates the muscle further and can open areas of tight restriction.
____________________________________________________________________
First time users may be sore 24-72 hour later due to myofascial release, toxin release and new body positions. Imagine being stuck in one position for several hours then trying to move your body- it’s stiff and painful to move. Your tissues will experience the same.
Drink plenty of water– add 1-2 extra liters to your daily regimen to flush out toxins you just released. Drinking water helps rehydrate your cells.
The more you foam roll- the easier it gets and with quicker results. If initially doing a lot of static moves and 90 second holds, you will need recovery days between sessions. Once you get to the point of tissue maintenance and you are not experiencing excessive trigger points, you can do a daily full body sequence in 15 minutes.
If a movement is too painful then alter your body weight position, do less repetition or do not do the movement. Either the position is incorrect (on bony structure), the foam roller is too dense or you need to ease into the movement.
For muscle spasm and trigger point release, hold the position for 10-15 seconds or until pain is 50% improved. Some positions may need up to 90 seconds.
Be careful in thoracic spine mobilizations. If you have disc issues or instability you should not do the movements unless approved by your doctor. Normal populations may experience some “popping” in the spine with the thoracic movements. The popping should not be painful. If any pain lasts longer than 3 days you should see your doctor.
Practice deep breathing for better results. As you inhale visualize a healing energizing light and visualize exhaling stress and toxins. Cleansing breaths help increase the oxygen that has been deprived to your muscles.
Gently roll on the foam roller and change positions. This is a refinement of movement and gentle stretching. The idea of “more is better” does not apply.
Do not push past your pain tolerance. If you cannot relax your body because the pain is too great, you need a softer foam roller or padding. Being tense only further increases tissue restriction.
An anatomy chart is useful to see the body structures. I encourage you to become more familiar with anatomy, trigger points and fascia.
____________________________________________________________________
Click here to download the Si Boards Foam Roller Instructions


Click here to download the Si Boards Foam Roller Instructions
Comments will be approved before showing up.

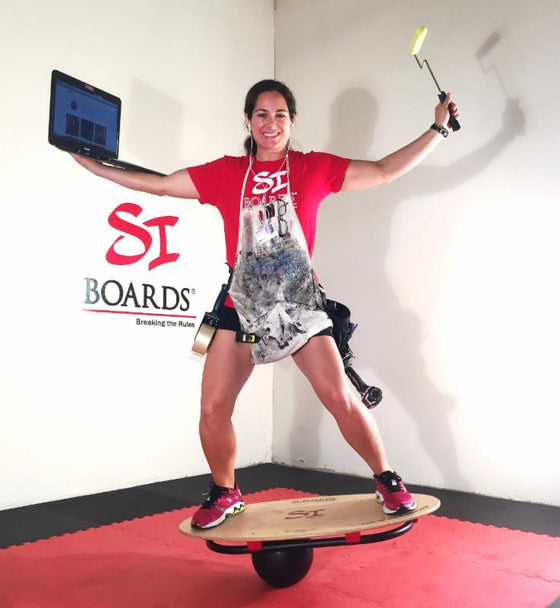
Big thank you to our social media fans for being awesome. I truly appreciate the respectful and caring nature of all our fans. When we need you- you are always there to lend advice and to welcome new Si Boarders. That makes us motivated to wake up every day with a drive to be better and help you fully use your Si Boards training tools. Thank you for being a part of the dream!
